

")
If you walked into the bathroom midway through this makeup routine, you might be terrified. We’re talking stark stripes of dark contour, bright spots of blush, and unblended concealer that looks less like a beauty look and more like a geometry project. But then, magic happens. A sheer layer of foundation goes on top, and suddenly, those harsh lines disappear, replaced by cheekbones that look naturally sculpted and a flush that looks like it’s coming from your skin, not sitting on it.
Welcome to the world of Underpainting. While it’s currently having a viral moment on social media, this isn’t a new fleeting trend. It is a classic technique used by professional makeup artists for decades to create that elusive “model off-duty” look.
")
Flipping the Script Most of us were taught a very specific order of operations: Foundation first to blank out the canvas, followed by contour, bronzer, and blush. The problem? Layering colored products on top of a base can sometimes look heavy, cakey, or obvious in harsh lighting. Underpainting flips the script entirely. You apply your contour, bronzer, and blush before your foundation.
The logic is simple but effective: by putting the “bones” of the makeup underneath, the foundation acts as a diffuser.
It softens edges and mimics how natural shadows and colors appear on a human face—from beneath the surface.
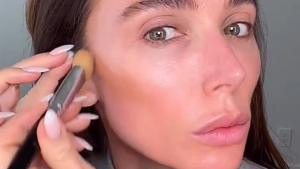
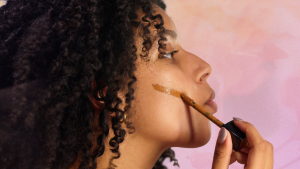
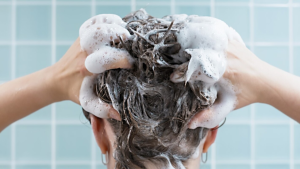
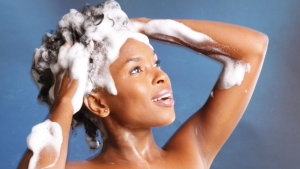
The “Trust the Process” Routine The key to nailing this look is simple: don’t panic. At stage one, you are going to look a little crazy. Start with serious skin prep. You need a hydrated, slippery base so products glide rather than drag. Once primed, go in with your contour.
Apply it to the hollows of your cheeks, temples, and jawline.
The research suggests you can actually be a bit heavy-handed here because the foundation you apply later will mute the color significantly. Next, hit the apples of your cheeks with blush and apply concealer to the high points of your face. Give everything a rough blend—it doesn’t have to be seamless yet—and then prepare for the final, crucial step.
")
The Foundation Filter This is where the technique succeeds or fails.
You cannot just smear a heavy matte foundation over your work, or you’ll hide it completely. You need a sheer-to-medium coverage liquid foundation or a skin tint.
Using a damp beauty sponge or a fluffy brush, you must stipple (tap) the foundation over your face. This part is non-negotiable. If you swipe or drag the brush, you will muddy the colors underneath and ruin the placement. Tapping pushes the foundation gently over the contour, creating that filtered, soft-focus finish.
The Golden Rules of Underpainting Before you try this tomorrow morning, keep two major rules in mind to avoid a muddy mess. First, texture matters. This technique relies almost entirely on creams and liquids. Powders are the enemy of underpainting; they don’t blend well under liquid foundation and will turn patchy instantly.
Save your powders for the very end, and even then, use them sparingly just to set the T-zone. Second, sheer it out. If your favorite foundation is full-coverage, don’t toss it. Just mix it with a little moisturizer on the back of your hand to thin the pigment before applying.
Underpainting might add a minute to your morning, but the payoff is huge: seamless dimension that looks like great skin, not great makeup. Just remember to trust the process.


